Installation
Weather Station is the primary public install path for Bellweather plugins. It handles downloads, updates, and licensing in one place. If you prefer a standard package install, direct macOS installers remain available as a secondary path.
Install via Weather Station
Weather Station is the default Bellweather workflow for downloading, installing, updating, and managing plugins.
- 1
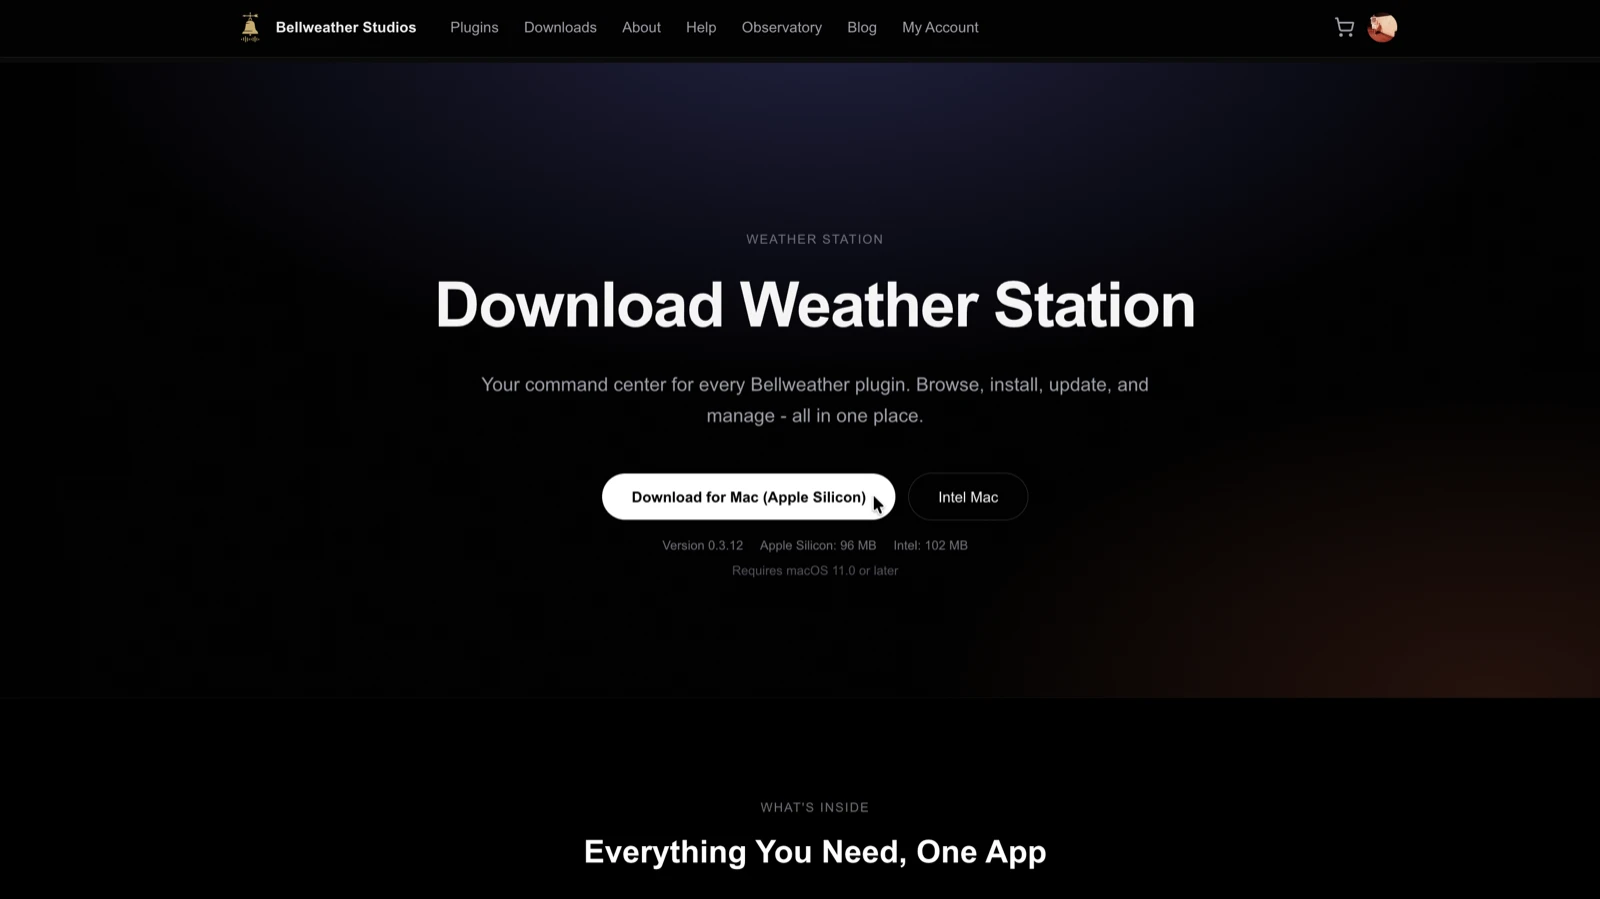
Download Weather Station
Weather Station is a free desktop app that manages all your Bellweather Studios plugins. Go to bellweatherstudios.com/downloads and choose the Apple Silicon or Intel build for your Mac. Not sure which? Click the Apple menu, then About This Mac.
- 2
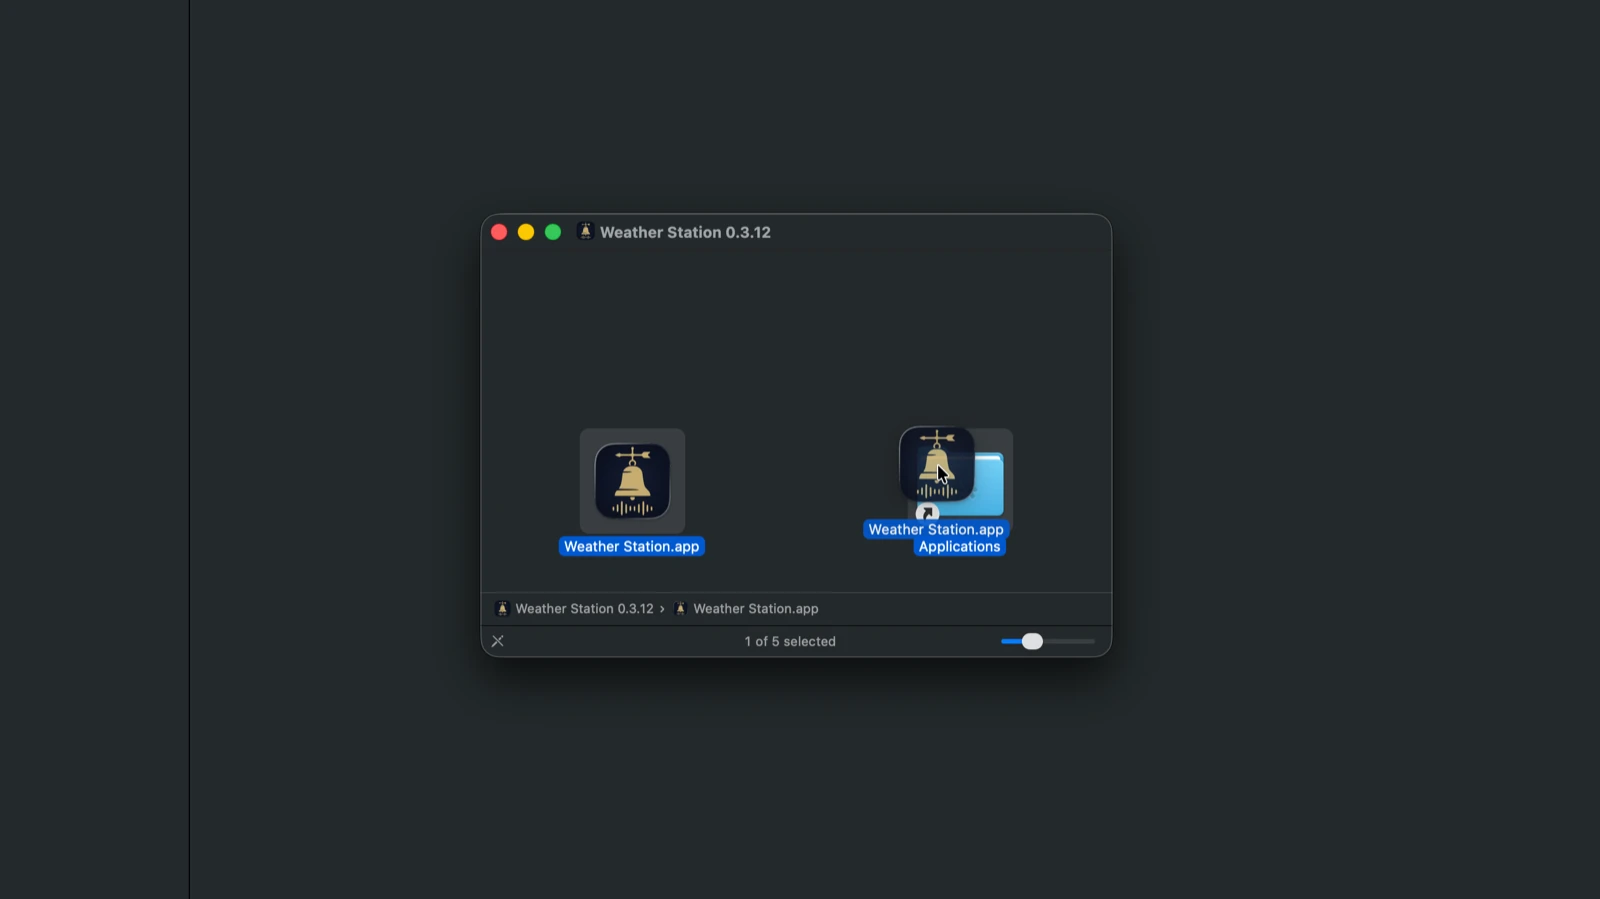
Install Weather Station
Open the downloaded DMG and drag Weather Station into your Applications folder.
- 3
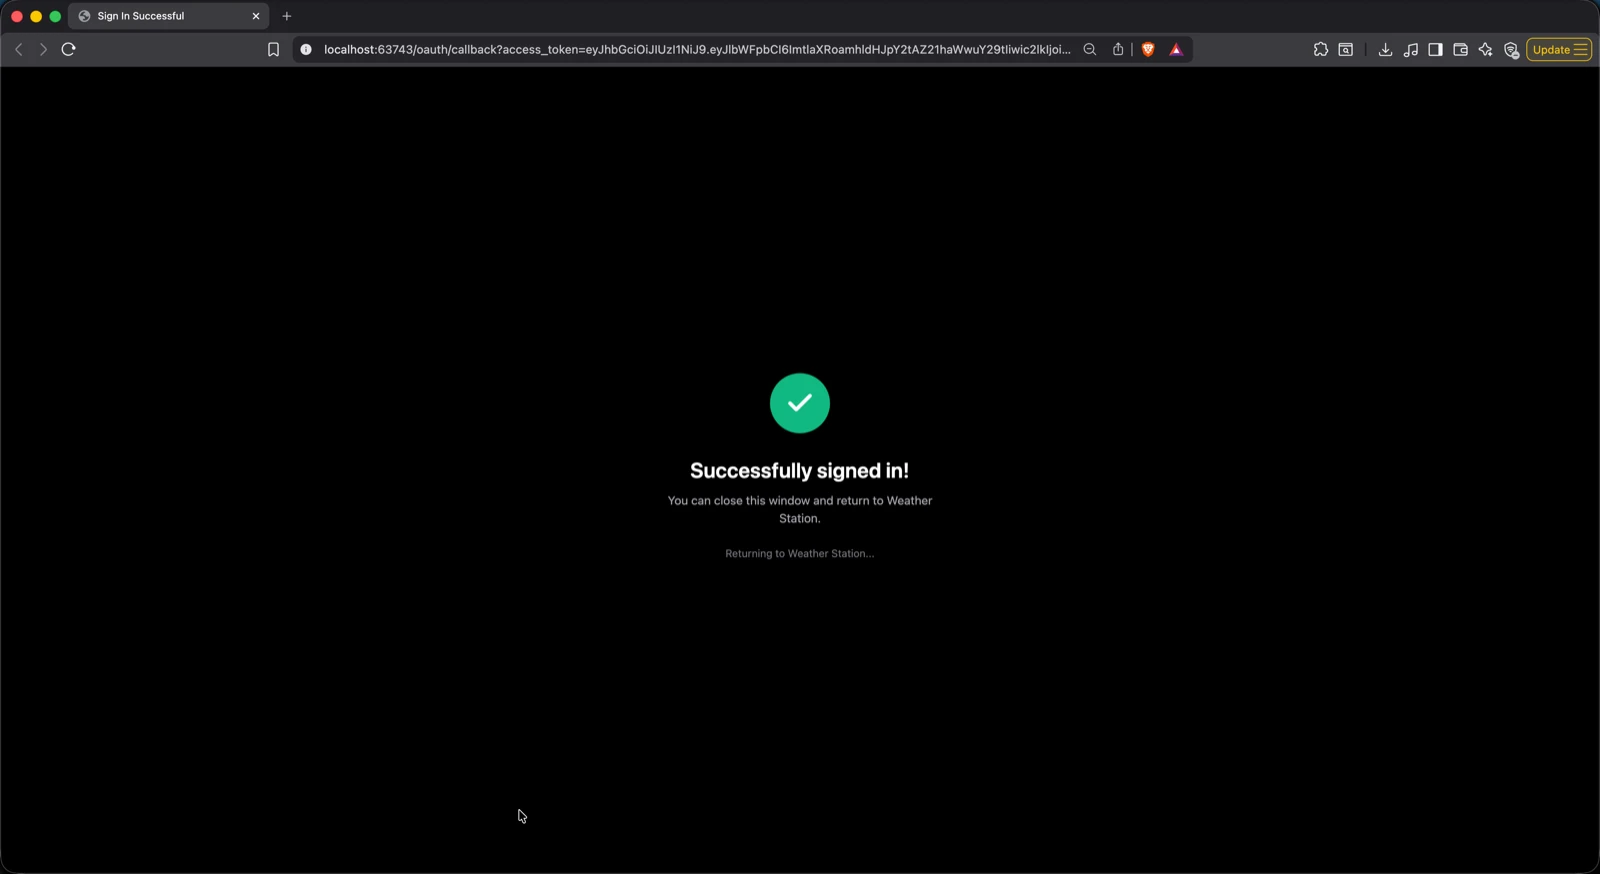
Sign in or create an account
Launch Weather Station and sign in with your Bellweather Studios account. If you do not have one, creating an account takes 30 seconds.
- 4
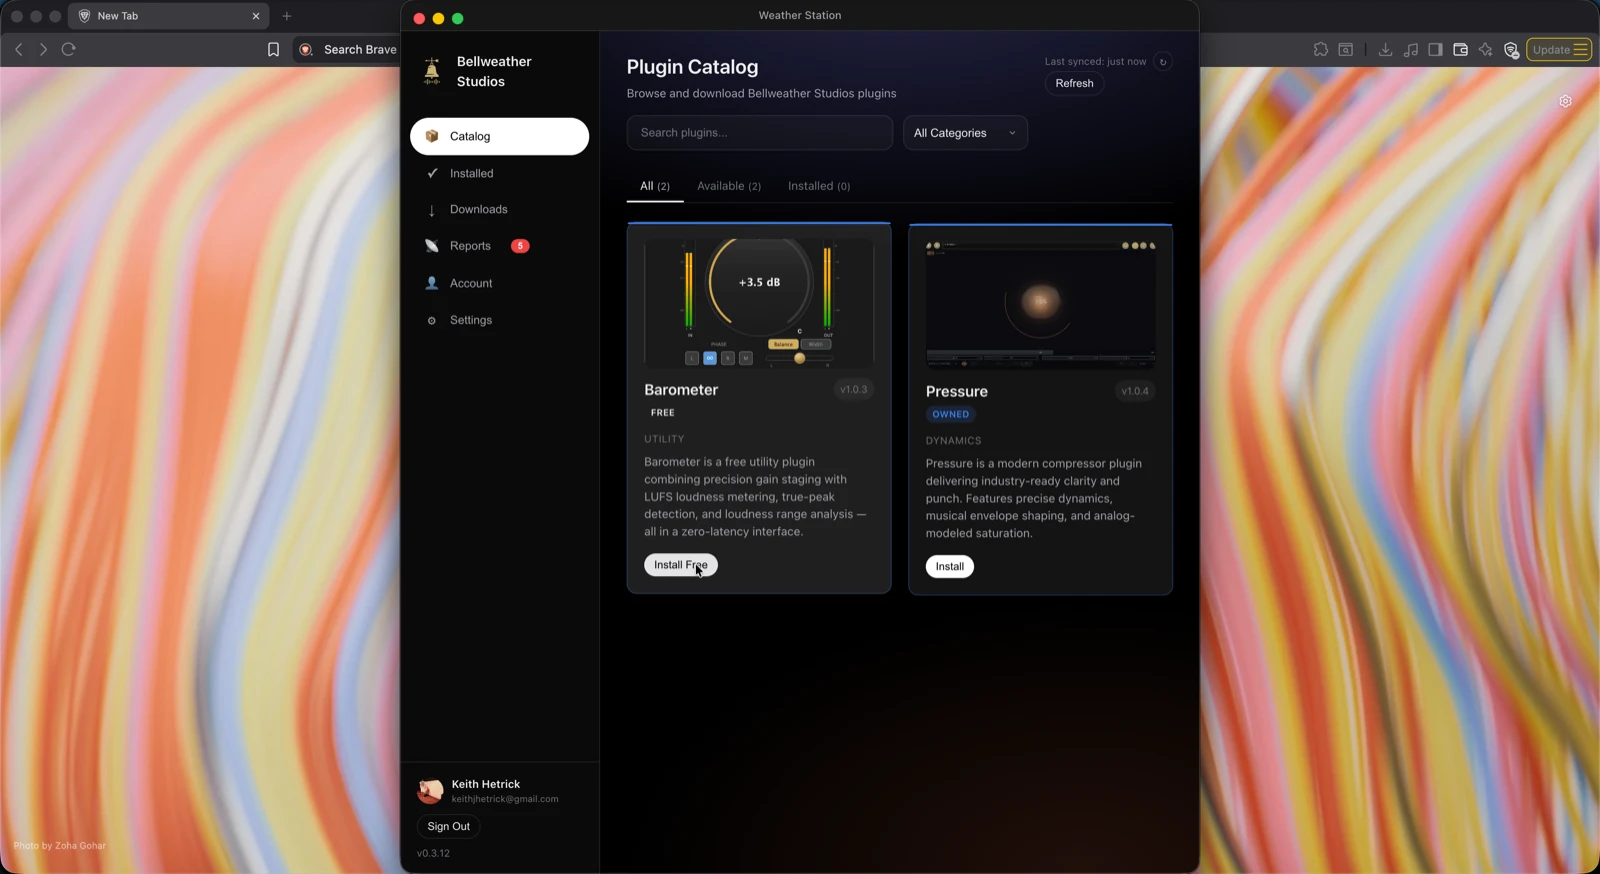
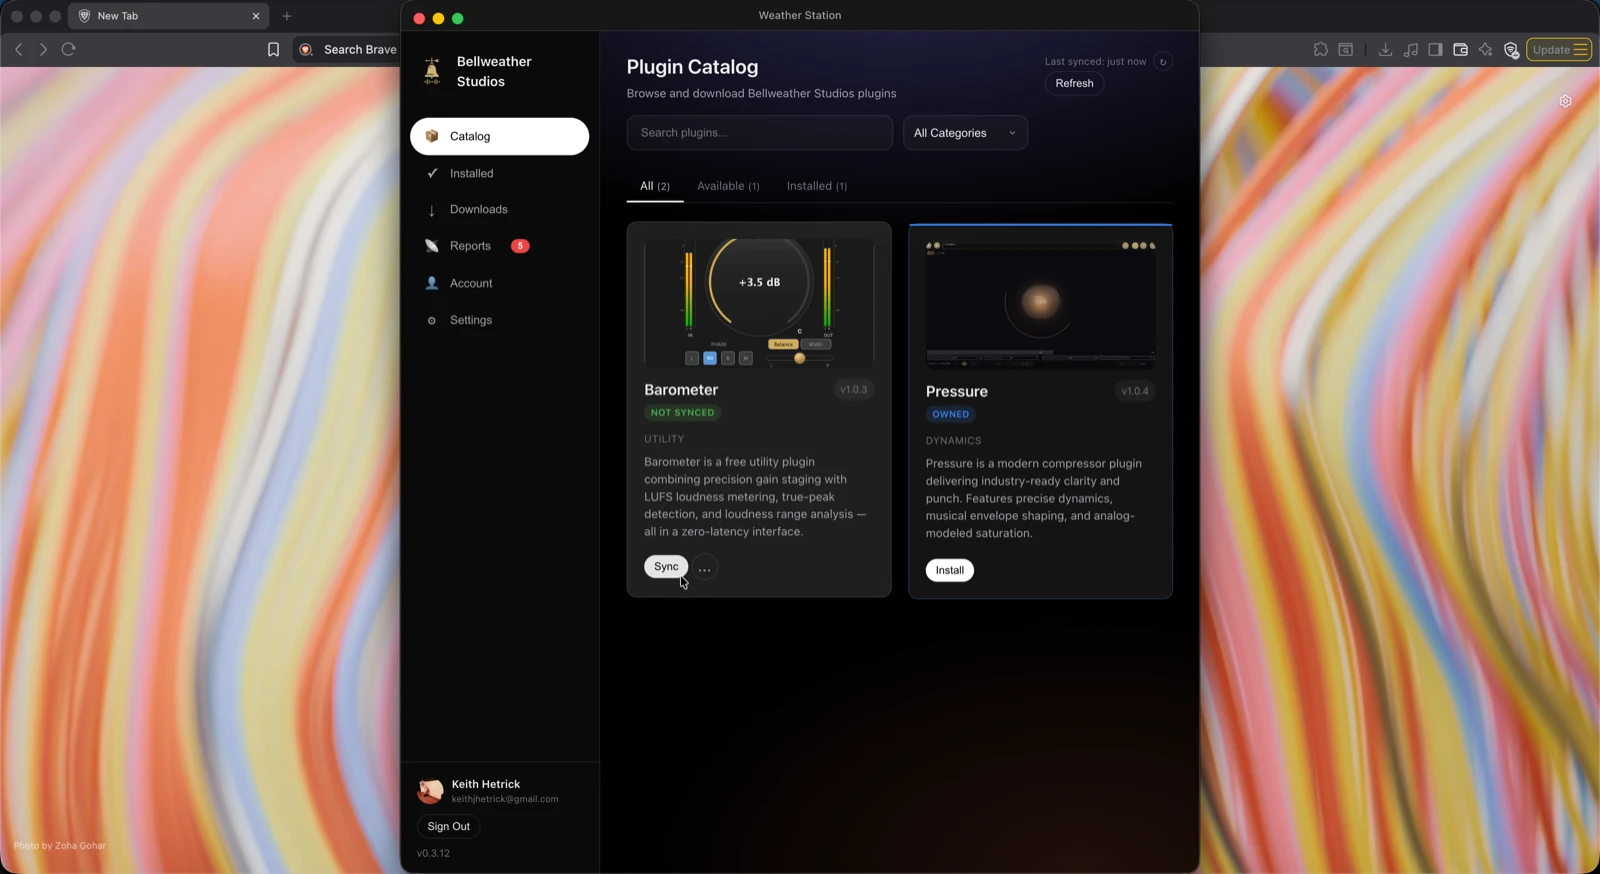
Browse the Catalog
Go to the Catalog tab. You will see every available Bellweather plugin along with its current version and install status.
- 5
Click Install
Click Install next to the plugin you want. Weather Station downloads and installs VST3, AU, AAX, and CLAP formats to the standard macOS plugin folders. You may be asked for your macOS password.
- 6
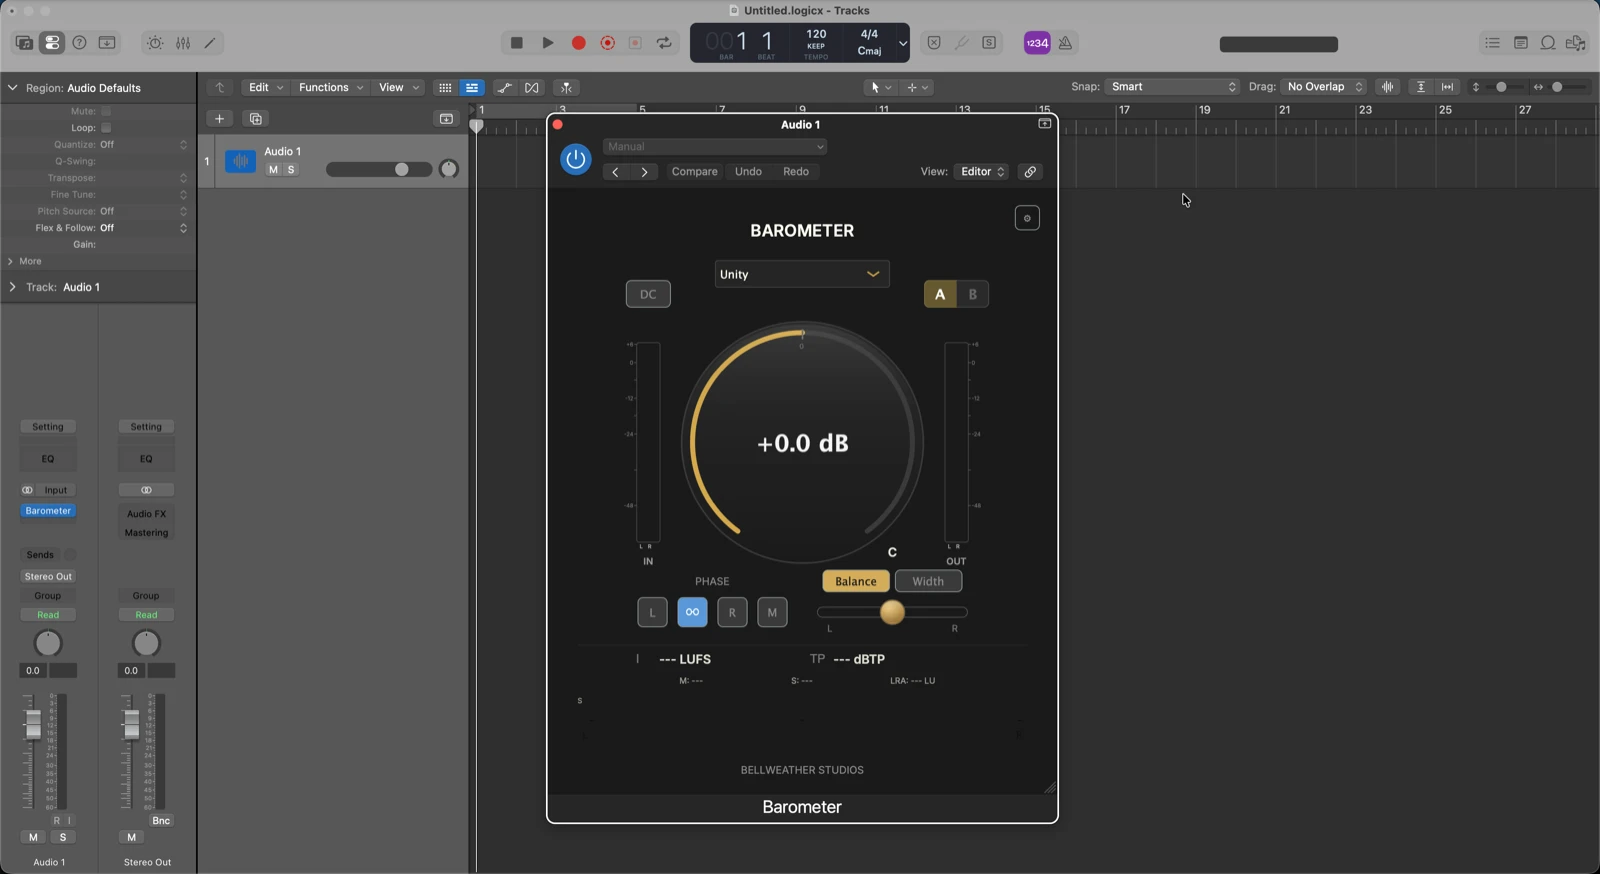
Open your DAW
Launch your DAW. The plugin appears in your insert or effect list. If it does not show up, run a plugin rescan from your DAW preferences.
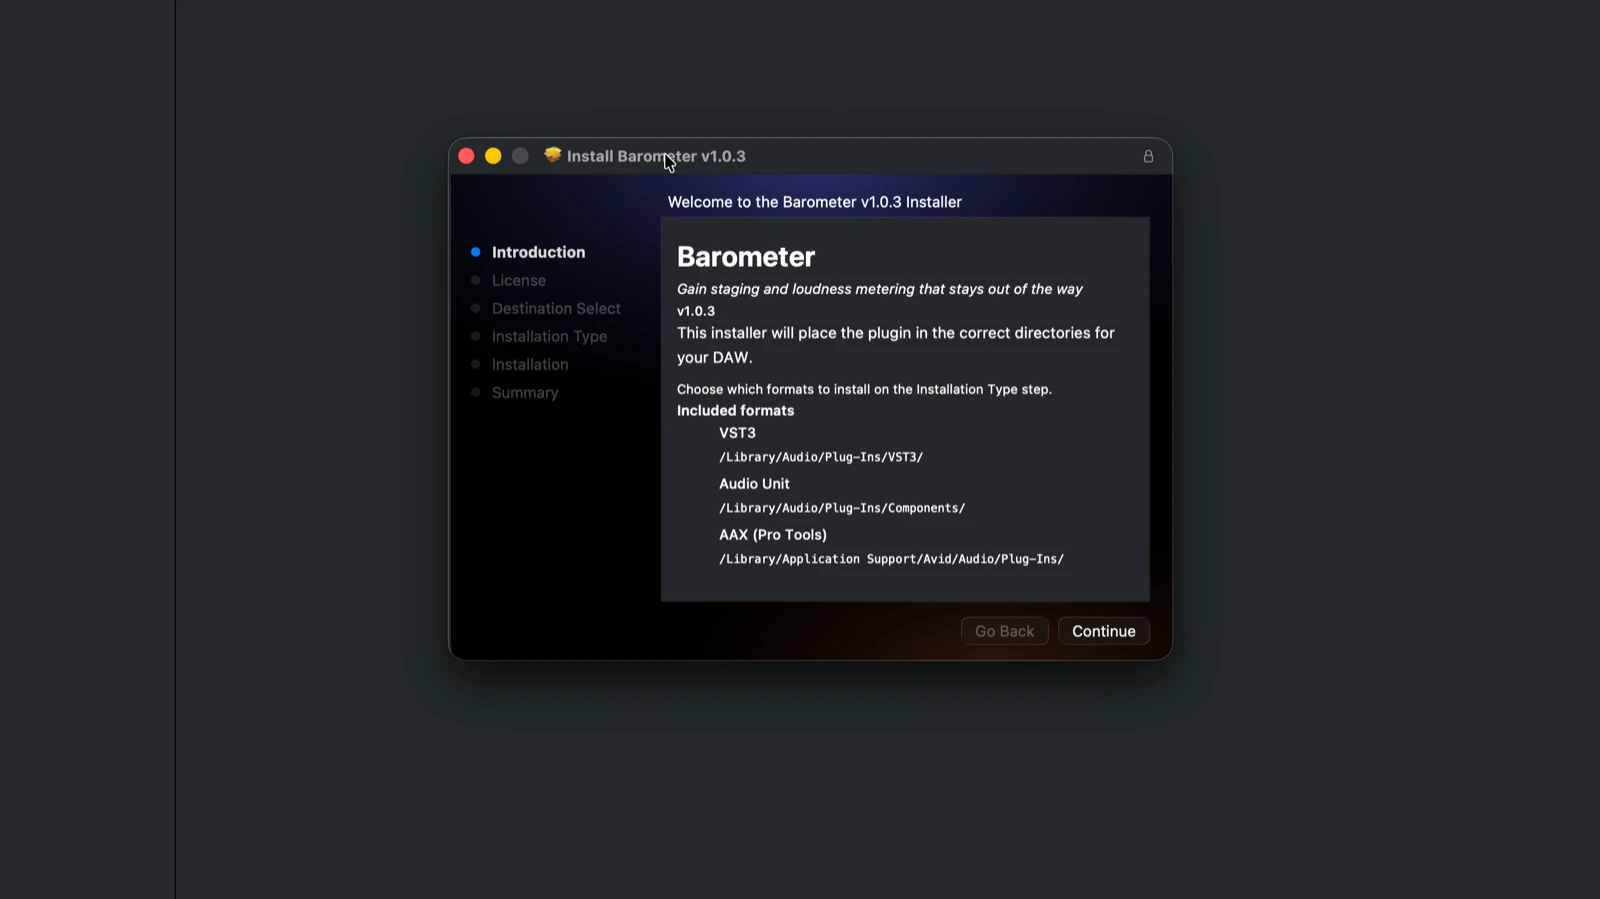
Install via Package Installer
Use a standard macOS installer when you prefer a package install outside the Weather Station workflow. It still handles format placement automatically.
- 1
Download the plugin installer
Download the installer from your purchase confirmation email, your account page, or the website download surface for that product.
- 2
Run the installer
Open the downloaded package and follow the prompts. The installer places VST3, AU, AAX, and CLAP formats in the standard macOS plugin folders automatically. You may be asked for your macOS password.
- 3
Rescan in your DAW
Open your DAW and run a plugin rescan. Most DAWs scan automatically on launch. If the plugin does not appear, check the troubleshooting section for per-DAW instructions.
- 4
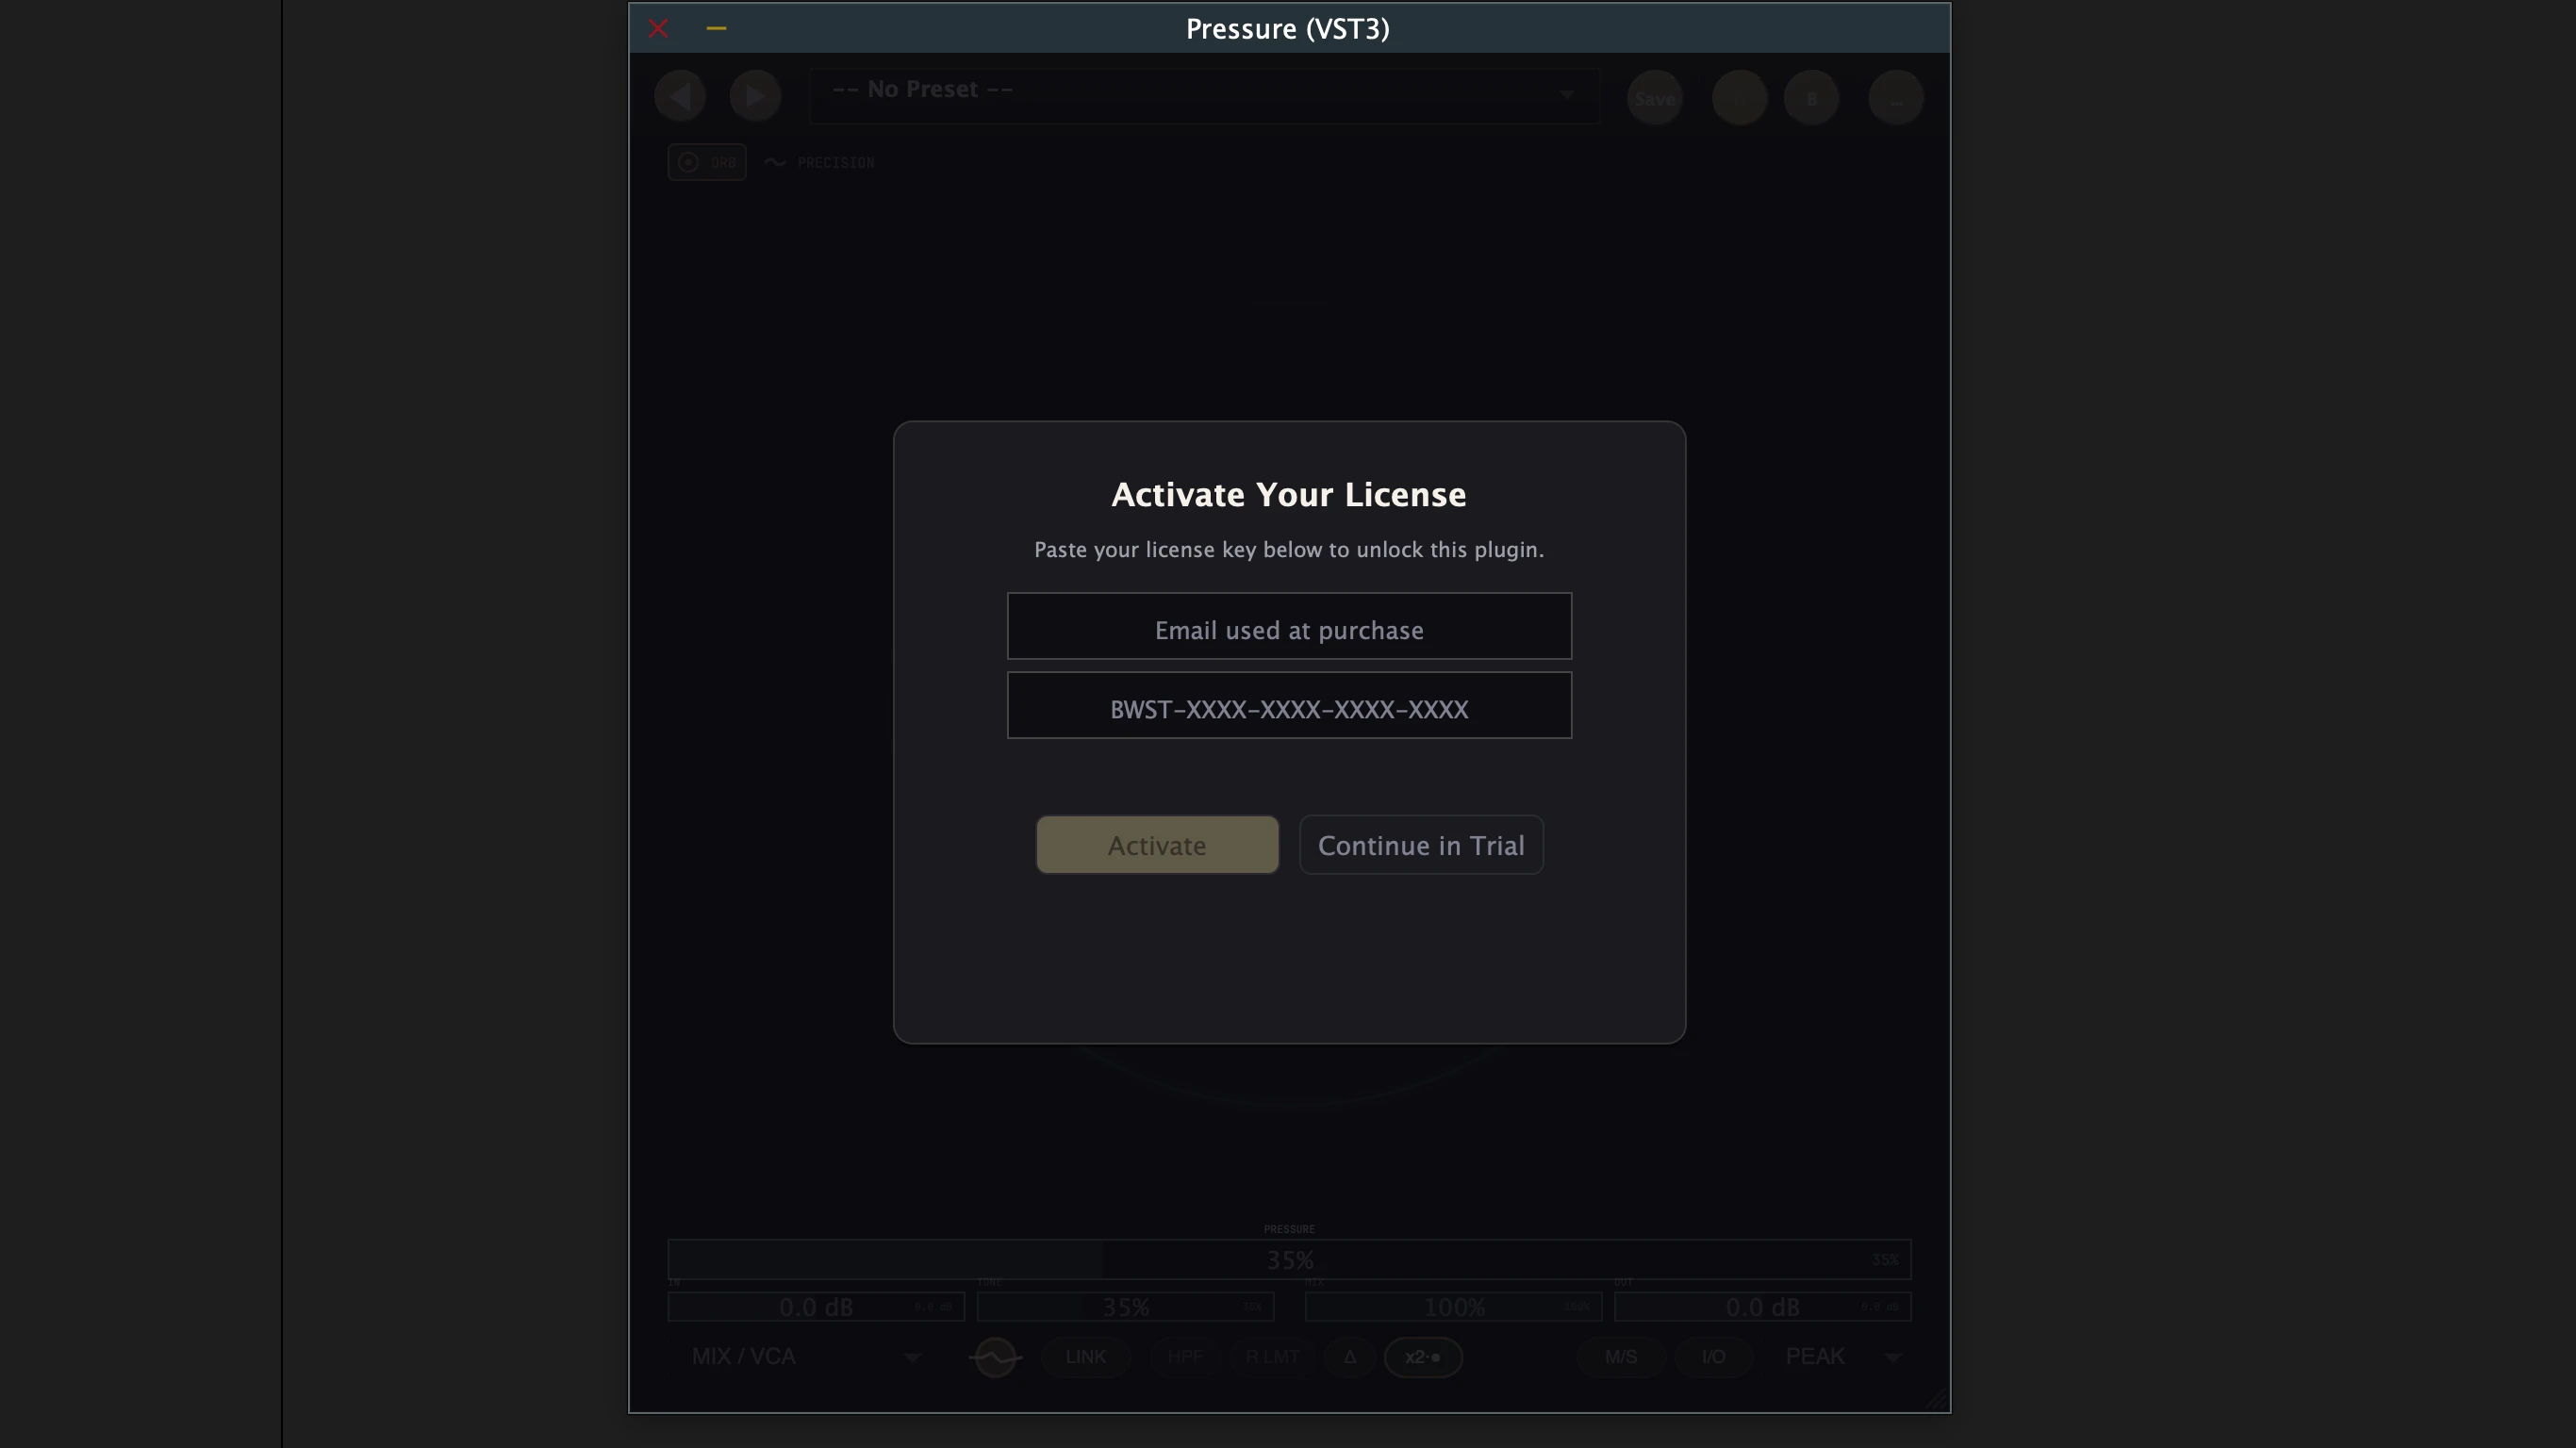
Activate your license
Open the plugin in your DAW. On first launch it will prompt for your license key when the product requires one. Paste the key from your purchase email and click Activate.
Already have plugins installed?
If you already have Bellweather plugins installed from the package installer or a previous version, Weather Station will detect them automatically. Your plugins appear in the Catalog with a “Sync” option and their version number. Weather Station manages updates going forward - no re-download needed.
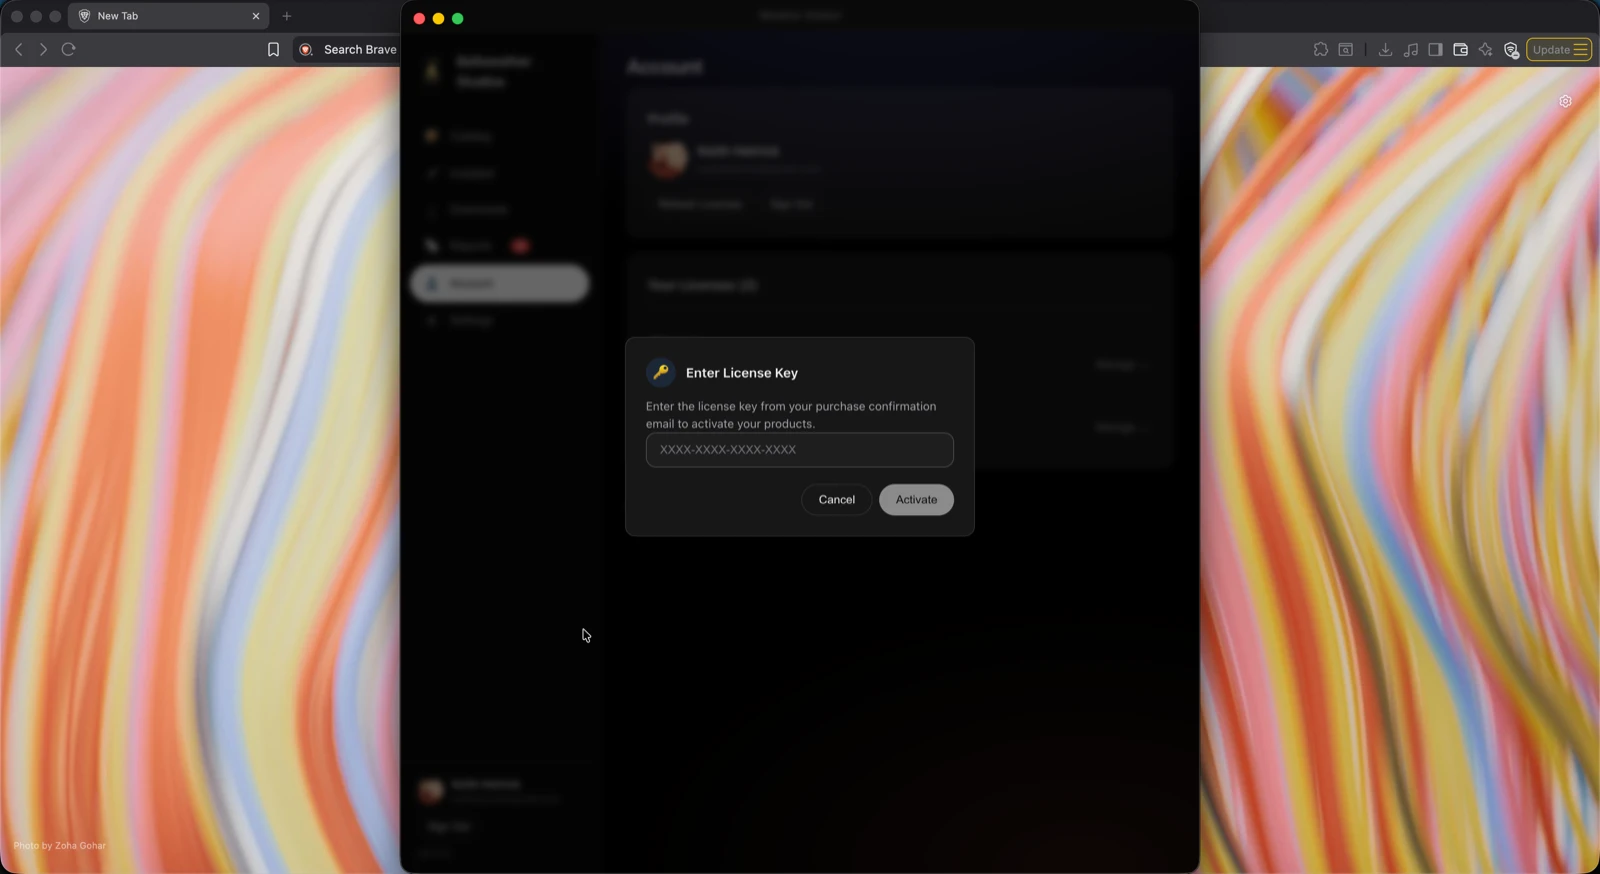
Activation
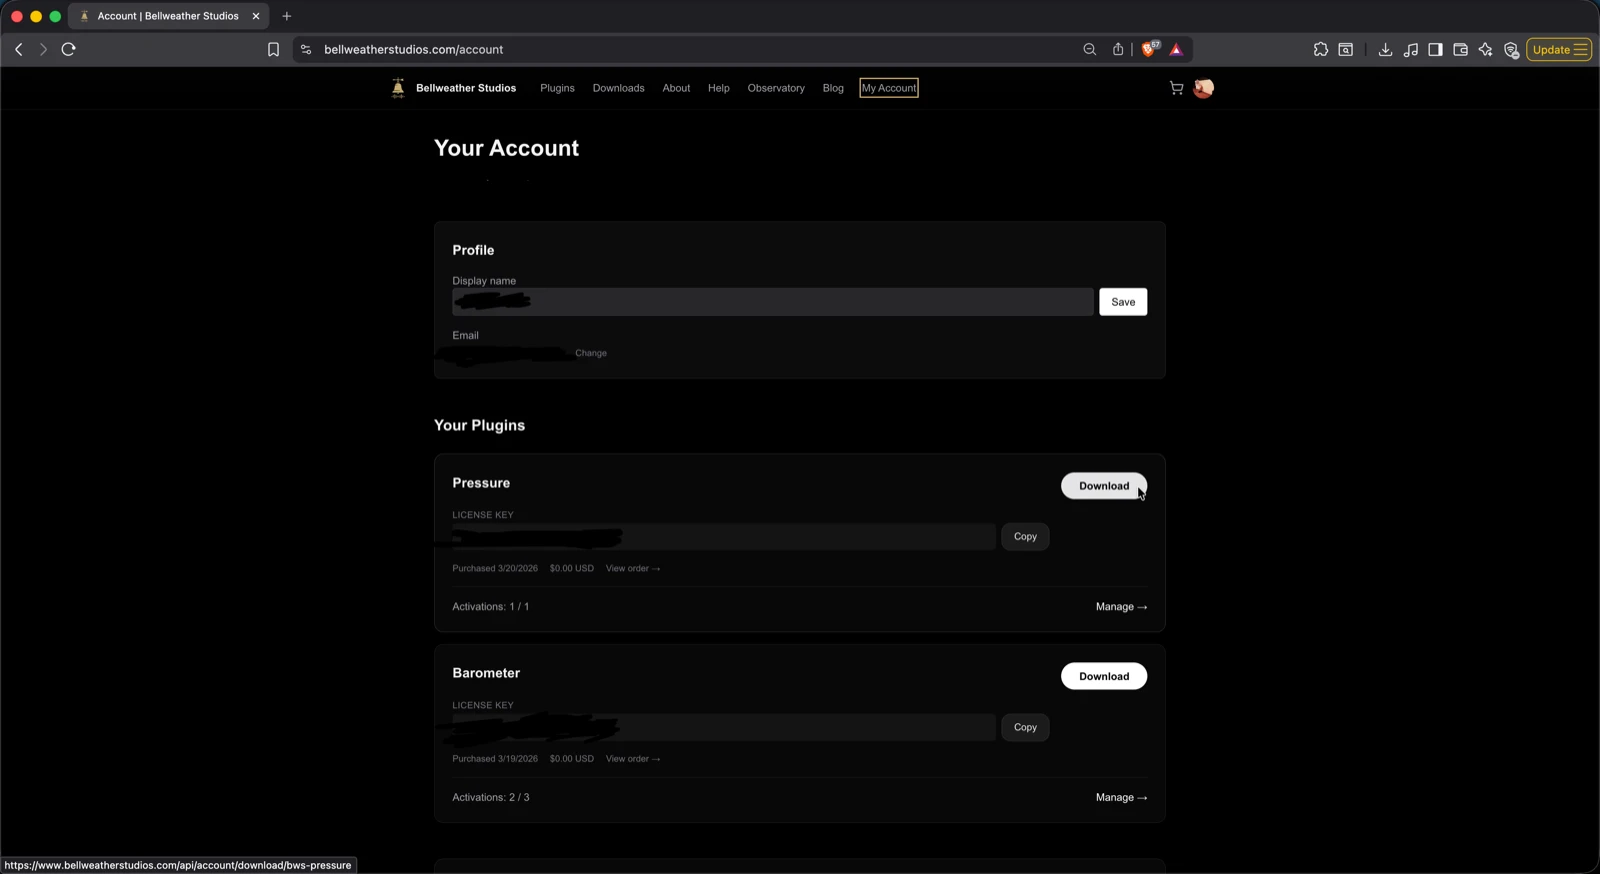
Installed via Weather Station
Go to the Account tab, paste your license key, and click Activate. Licensed plugins unlock in the Catalog.
Installed via package installer
Open the plugin in your DAW. On first launch it will prompt for your license key. Paste your key and click Activate.
Free plugins (Barometer)
Sign into Weather Station and click Install Free in the Catalog. Licensing is handled automatically. A free Bellweather account is required.
For license transfers, multiple machines, and offline use, see Activation & Licensing.
Available Downloads
| Plugin | Weather Station | Package Installer |
|---|---|---|
| Pressure | Yes | Yes |
| Barometer | Yes | Yes |
System Requirements
| Operating System | macOS 11.0+ |
| CPU | Intel or Apple Silicon |
| DAW | Any VST3, AU, AAX, or CLAP-capable host on macOS - including Pro Tools |
| Plugin Formats | VST3, AU, AAX, CLAP |
| Plugin Size | Under 50 MB per plugin |
macOS Security
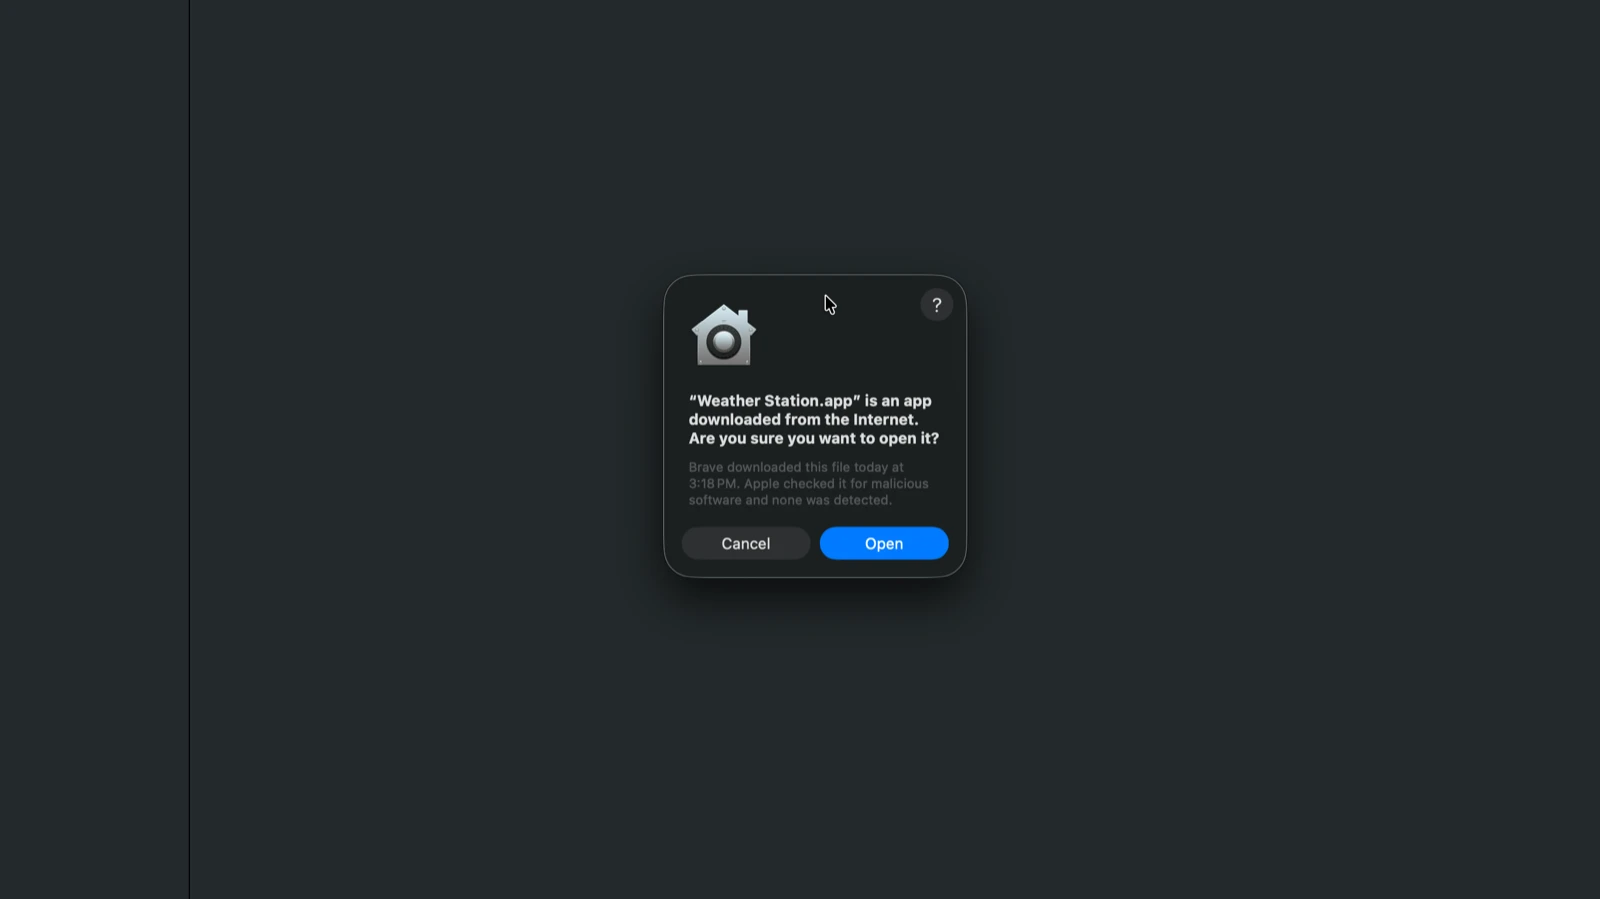
- •All Bellweather plugins distributed through Weather Station are Apple-notarized.
- •If you see a security warning, right-click the app, then choose "Open", then click Open in the dialog.
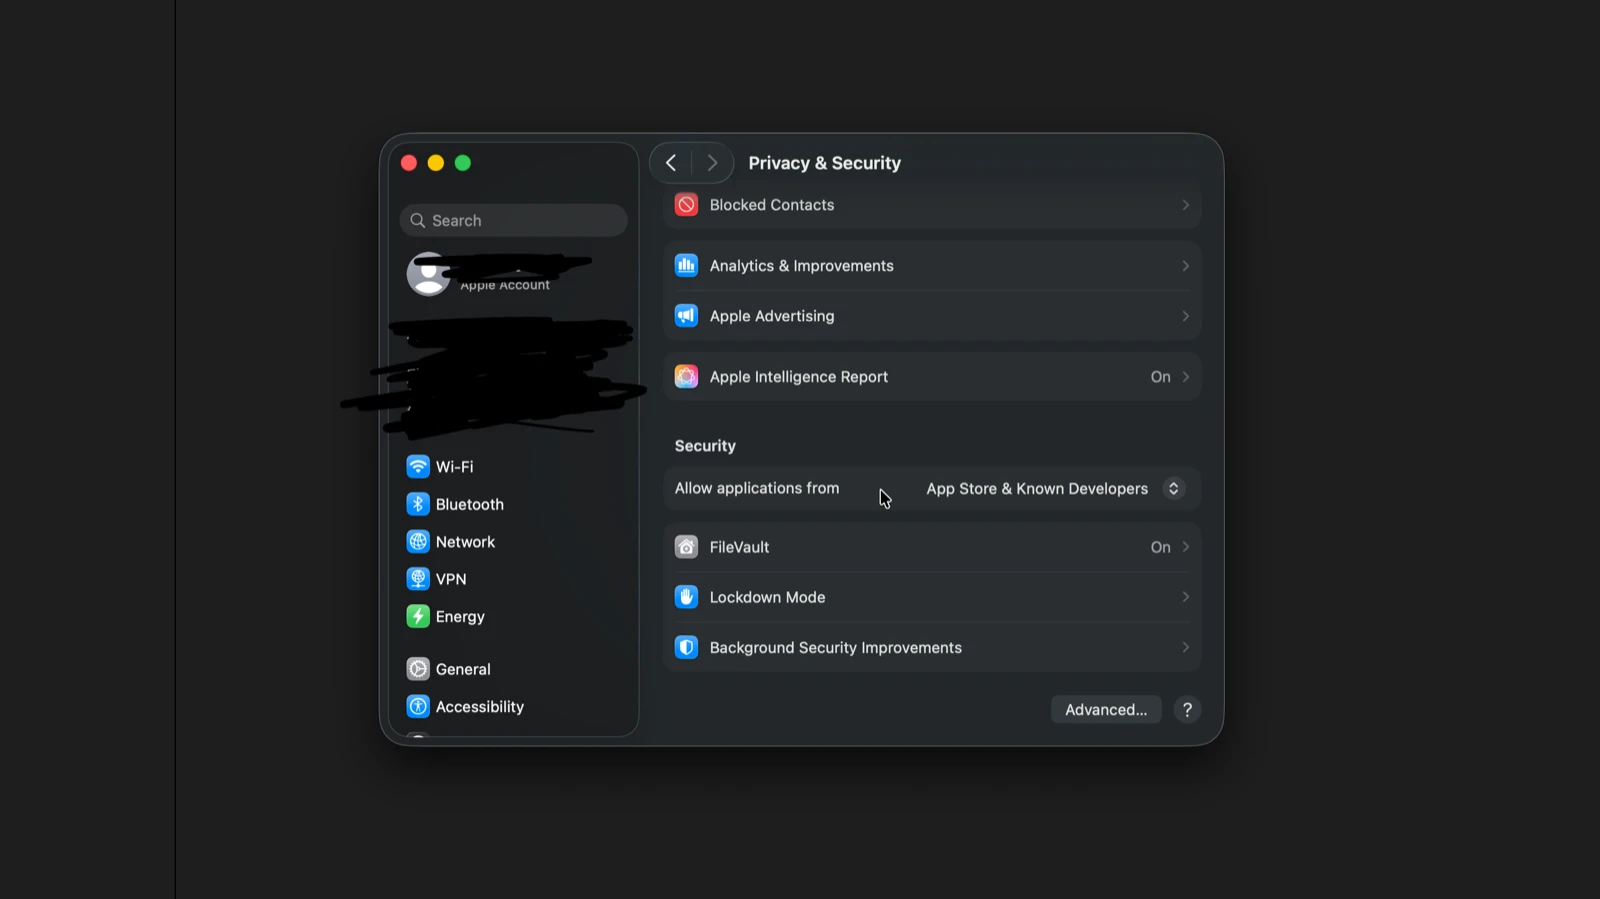
- •If the option does not appear, go to System Settings, then Privacy & Security, then click Allow.
Install Paths
| VST3 | /Library/Audio/Plug-Ins/VST3/ |
| AU | /Library/Audio/Plug-Ins/Components/ |
| AAX | /Library/Application Support/Avid/Audio/Plug-Ins/ |
| CLAP | /Library/Audio/Plug-Ins/CLAP/ |
Plugins are always installed to these standard system paths. Custom install locations are not supported.
DAW Plugin Scanning
Format note: Logic Pro uses AU only. Pro Tools uses AAX only. REAPER and Bitwig also support CLAP. Most other DAWs use VST3 (also support AU). Every format is installed - your DAW will find the right one.
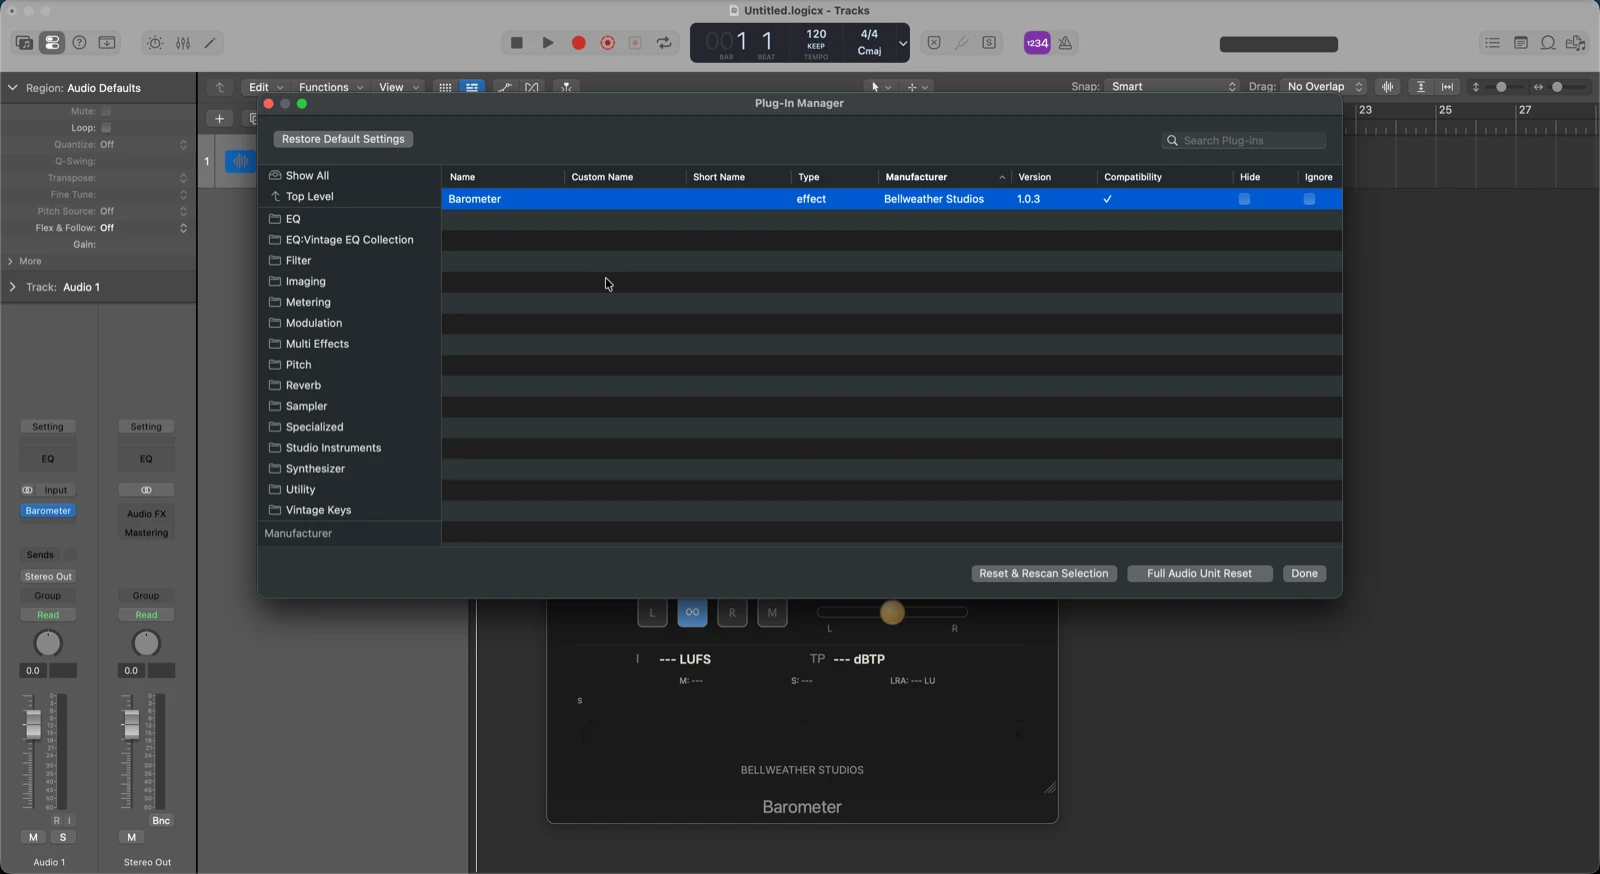
Logic Pro (AU only)
Logic scans automatically on launch. If the plugin does not appear, go to Logic Pro, then Settings, then Plug-in Manager, then Reset & Rescan. If Logic shows a validation error, open Terminal and run auval -v aufx BWxx BWst to check. Contact support with the output.
Ableton Live (VST3 or AU)
Go to Preferences, then Plug-Ins, then enable VST3 or AU. Click Rescan.
Pro Tools (AAX only)
Restart Pro Tools. It scans for new AAX plugins on launch. For issues, verify the plugin exists in /Library/Application Support/Avid/Audio/Plug-Ins/.
Cubase / Nuendo (VST3)
Go to Studio, then Studio Setup, then VST Plug-in Manager, then click Rescan All.
Reaper (VST3, AU, or CLAP)
Go to Options, then Preferences, then Plug-Ins, then VST, then click Re-scan. Reaper also discovers CLAP plugins from the standard CLAP directory automatically.
FL Studio (VST3)
Go to Options, then Manage plugins, then click Start scan.
Studio One (VST3 or AU)
Go to Studio One, then Options, then Locations, then VST Plug-Ins. Click Reset Blacklist, then Rescan.
Bitwig (VST3 or CLAP)
Go to Settings, then Plug-Ins, then click Rescan. Bitwig also scans the standard CLAP folder.
Need Help?
Troubleshooting guide - per-DAW rescan steps, common issues
FAQ - uninstall, licensing, macOS security, and more